This article explains how to perform and optimize Quick Captures within our Avatour Host App.
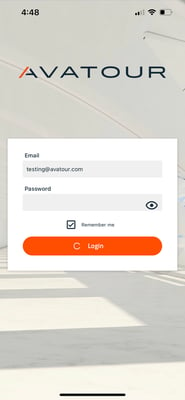
Step 1: Login to the mobile Avatour Host app
Using your host credentials, login to the app to display our app menu and a list of your Workspaces.
Step 2: Connect your Insta360 camera to the Avatour Host app
You can connect your camera wirelessly to the app, or with an Insta360 data transfer cable. See one of the below Knowledge Base articles if you need assistance:
Step 3: Select Quick Capture within the 360 Capture menu option
Once your camera is successfully connected, select the 360 Capture menu option at the bottom of the screen. Your camera should display on screen with the Quick Capture option.
.jpg?width=185&height=400&name=image_123650291%20(17).jpg)
From here, you can select the capture settings for both Live and Quick Capture. We recommend the following for Quick Capture:
- Target Frame Rate: 30
- Target Bitrate: 20
Select Quick Capture to begin taking a recorded video or 360 picture.
.jpg?width=185&height=400&name=image_123650291%20(18).jpg)
Step 4: Connect audio device
When recording a video, the audio captured is determined by which audio device is connected to your phone (EX: bluetooth headphones/speaker). If no audio device is connected, then your Quick Capture's audio will be from your phone's built-in speaker and microphone.
See our Knowledge Base article here to review our audio recommendations.
Step 5: Upload Recorded Assets to a Workspace
Once you've stopped recording or have taken a photo, these files are saved in our app's Gallery. You can access the Gallery by either tapping your video/image preview at the bottom left of the Quick Capture screen (can be seen from image above), or closing Quick Capture and selecting Gallery from the menu at the bottom of your screen. From here, you can edit your file's name, preview, and upload to a Workspace.

If you run into any issues, please use this link to open a support ticket with Avatour Support.